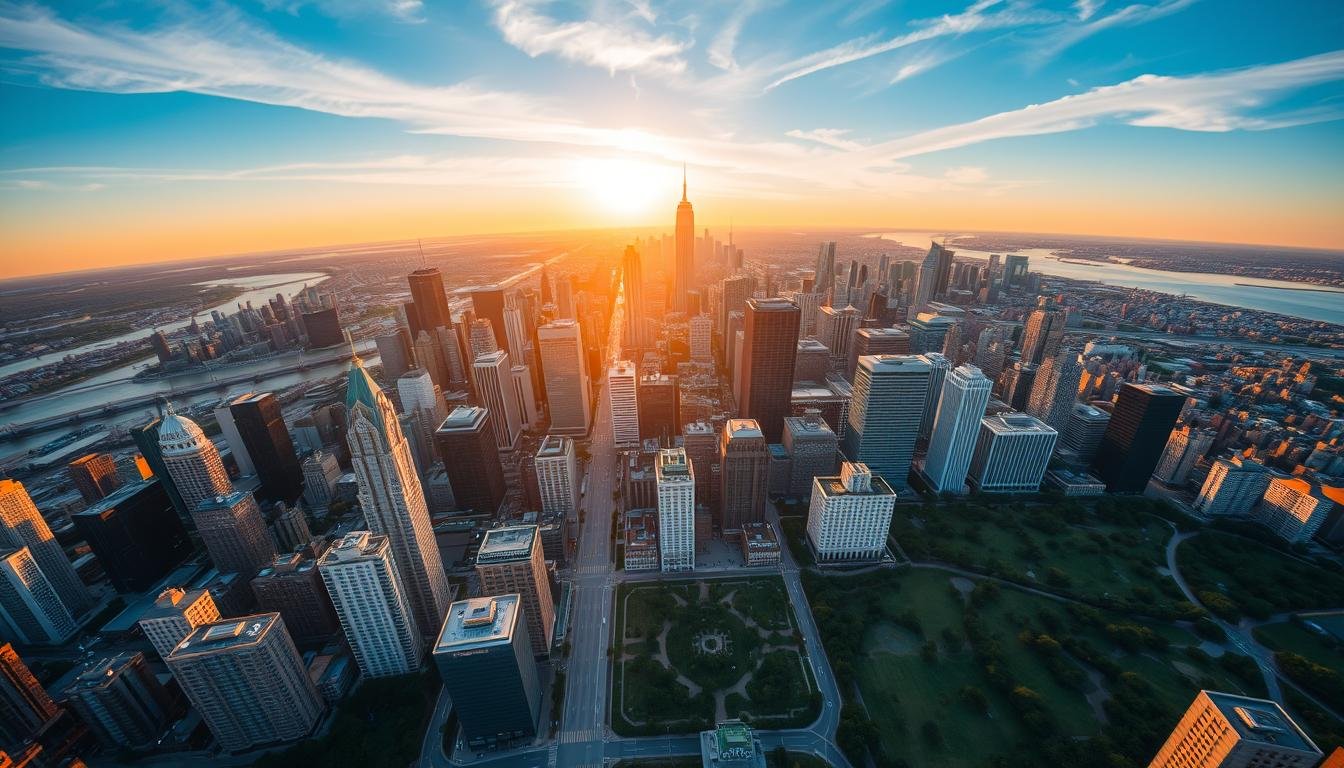
The hum in your chest starts before your eyes catch sight of Horseshoe Falls. Mist cools your face as the boat moves closer, the ground shifting slightly. In the midst of wind and water, you aim for more than just a snapshot. You want a photo that captures the roar, the vastness, the wonder.
This guide provides real advice from the decks of Niagara Falls boat cruises. It shows you the best time for photos, how to stay steady on a moving boat, and how to handle the bright sunlight and mist. It’s all about taking great photos while in motion and dealing with the weather, especially from the Canadian side, to get pictures that really feel alive.
It doesn’t matter if you use a professional camera or just your phone. These tips will show you how to take clear, powerful photos of Niagara Falls right from the gorge’s heart. Your photos will do justice to the beauty of Horseshoe, American, and Bridal Veil Falls, leaving you with memories that outlast the thunderous sounds.
Key Takeaways
- Plan for light, motion, and mist to take your boat tour photography to the next level.
- Learn how to keep your camera stable, frame your shots, and protect your gear under changing weather.
- Choose a ride time when the light softens and brings out the textures of the falls and spray.
- Frame your shots to show the scale of the falls by including boats, rails, or ponchos.
- Get ready for sudden changes in brightness to keep your photos of Niagara Falls sharp and colorful.
- Good technique is key—small tweaks can make a big difference in your photos.
Why Your Boat Cruise Photos of Niagara Falls Matter
Your boat sits at water level. Here, the river slams into the boat and mist covers your camera. Standing there, Horseshoe Falls looks massive compared to people on the deck. This angle makes your photos feel huge and alive, unlike views from the edge.
From the Canadian side, you see Horseshoe Falls up close. You also get views of American Falls and Bridal Veil Falls. The gorge’s curve, the big drop, and the mist create amazing shots. With smart travel tips and photo advice, you’ll capture stunning, meaningful pictures.
Being on the water lets you catch brief, beautiful moments: spray patterns, wave fronts, and light that makes rainbows. Snapping these moments shares the waterfall’s power—the noise, the glimmer, the movement. Your photos then enhance albums, social media, and prints, making your photography stand out.
Your pictures show the time, weather, and colors you felt. Use easy travel tips for dealing with spray and movement. Good photo tips help you manage the light. That way, your Niagara Falls photos show real experiences, not just typical shots.
Best Time and Light for Shooting on the Water
Timing and light are key when you’re at the gorge. Plan your shots before getting on a boat. Mix smart photography skills with simple tips. This helps make every shot count. Remember to keep Niagara Falls Boat Cruise Photo Tips for Travelers in mind as the light changes.
Golden hour vs. blue hour on the Niagara Gorge
The golden hour makes the cliffs glow and adds soft light. It brings out textures in the water and rocks. And it keeps bright spots in the whitewater under control. The early golden hour also means fewer people and clearer views from the boat.
The blue hour gives a cool, dreamy look. Use a fast shutter speed because of the moving boat. This way, your photos stay sharp while capturing the vibe.
Mist, rainbows, and cloud cover: reading conditions
The sun’s angle is important. From mid-morning to early afternoon on the Canadian side, backlight makes the mist shine. If the sun is behind you at about 40–42 degrees, step a bit to the side. This simple move makes rainbows more vivid.
Cloudy skies soften the light, making contrasts gentle and keeping bright areas from glaring. When it’s windy, mist gets thicker. Keep your lens clean and protect your gear from water. You’ll capture dramatic, soft scenes that are perfect for a fast-moving boat tour.
Seasonal considerations for Canadian-side tours
In spring, the water is high and the spray is intense. Be ready to clean your lens often. Summer has long days and often shows rainbows, great for snapping quick shots. Fall brings bright leaves, adding color against the falls. Winter is colder and cruises are less frequent, but ice adds a striking look.
Check the boat schedules on the Canadian side and plan for the sunset. By timing it right, you make the most of the light. Your skills and tips will highlight the beauty of Horseshoe, American, and Bridal Veil Falls on your boat tour.
Niagara Falls Boat Cruise Photo Tips for Travelers
You want your photos to pop with crisp details, rich colors, and the true texture of the spray. These tips are for travelers who love photography. They combine practical advice with travel tips. This way, you can quickly capture the beauty of Niagara Falls from the deck. Keep your camera gear simple, be ready for movement, and focus on capturing the falls’ story.
Quick-hit tactics for sharp, vibrant images
- Use Shutter Priority or Manual with Auto-ISO. Keep speed high—1/500–1/2000s—to freeze boat sway and wind gusts.
- Set white balance to Daylight or Cloudy for steady color. Shoot RAW to refine tones later without losing detail.
- Protect highlights in white water. Dial −0.3 to −1 EV to hold texture in the foam and rainbow spray.
- Fit a lens hood to reduce flare from angled sun and stray droplets. This small step boosts contrast and color.
When the boat heads toward Horseshoe Falls, these photography essentials shine. Simple controls let you respond quickly. Meanwhile, consistent photography advice ensures steady results.
Mist management: staying dry while staying ready
- Wear the cruise poncho, but keep your camera under a light dry bag or jacket between shots.
- Carry two microfiber cloths. Wipe the front element center-out in quick passes to avoid smears.
- Add a clear or hydrophobic protective filter. It speeds cleaning and shields the front glass.
- Drop silica gel packs in your bag. If fog forms, cap the lens and warm it under the poncho until it clears.
Follow these travel tips to keep your gear safe without missing a shot. You’ll shoot more and worry less about moisture.
Stabilizing shots on a moving boat
- Brace against the rail, bend your knees, and time the shutter at the bottom of the boat’s motion.
- Use burst mode to raise your keeper rate. Short, controlled bursts beat one long spray-and-pray.
- Clip on a wrist strap or cross-body strap with a safety tether if permitted. Hands stay free and secure.
- Move with intent to open clean sightlines as the captain rotates the boat. Avoid blocking others and stay aware of footing.
Merge these techniques with the earlier photo essentials for surefire results. With steady form and focused advice, your pictures will capture every detail from the edge to the water below.
| Action | Why It Works | Pro Tip |
|---|---|---|
| 1/500–1/2000s shutter | Freezes sway, spray, and subject motion | Pair with Auto-ISO so exposure adapts in shifting light |
| −0.3 to −1 EV | Protects bright water highlights | Watch the histogram to avoid clipping on the right |
| Daylight/Cloudy WB + RAW | Consistent color with flexible edits | Fine-tune tint later to balance mist and sky |
| Lens hood + protective filter | Cuts flare; faster droplet cleanup | Keep a spare cloth in a poncho pocket |
| Rail brace and burst mode | Reduces motion blur; boosts keeper rate | Shoot at the trough of the boat’s swing |
| Silica packs and warm-up | Limits fogging in temperature shifts | Cap the lens while warming to clear condensation |
Essential Gear and Waterproof Protection
When you’re at the Niagara Gorge, you’ll deal with spray, wind, and changing light. It’s vital to pack wisely. Your gear should be chosen for both compactness and the demands of travel photography. This ensures your photos of Niagara Falls are both sharp and safe.
Weather-sealed cameras and compact alternatives
Cameras and lenses from Canon, Nikon, Sony, Fujifilm, and OM System are built to handle mist. Yet, it’s wise to protect them between shots. Always have a rain cover handy and cover the lens as you move. For less weight, consider OM System Tough series or a premium compact that can handle splashes, kept in a dry pouch.
Cold and moisture drain battery life. Keep extra batteries warm in a sealed pocket. This trick helps ensure your photography stays reliable, even in tight spaces.
Lens choices: ultra-wide, standard zoom, and prime
An ultra-wide lens, like a 14–24mm, captures vast scenes like Horseshoe Falls and cliffs together. A zoom lens around 24–70mm or 24–105mm is great for tighter shots of boats and people, adding scale. Use a fast 35mm or 50mm lens for clear detail and low-light conditions.
Protect your lens with a clear or UV filter to take on the mist. Try not to change lenses on deck, but if you must, shield your camera from spray. This quick switch keeps your equipment safe from water and dirt.
Dry bags, microfiber cloths, and anti-fog strategies
A roll-top dry bag is essential for keeping your kit dry, along with microfiber cloths and a towel. Change cloths often to prevent smears on your lens. These steps add a bit of time but protect your shots.
To avoid fog, warm your gear inside before going out. Keep lenses capped till the temperature outside is stable. Use anti-fog wipes. Store your camera in a dry bag when not in use. These techniques ensure your lens stays clear, making your travel photography spot-on, even in mist.
Camera Settings That Handle Mist and Motion
At Niagara Falls, you’ll deal with mist, changing light, and a moving platform. Use simple, repeatable settings so your photos stay sharp and vibrant. These photo tips mix practical control with safety measures, giving you advice you can rely on in tough conditions.
Shutter speed for spray and action
To freeze water droplets and movement, start at 1/1000s. For a bit of flow in the falls, reduce speed to 1/250–1/500s but keep the boat stable. In windy conditions, choose faster speeds; the platform’s movement is key.
Aperture for depth and edge-to-edge sharpness
Choose f/5.6–f/8 for balanced depth and sharp detail throughout. For sharp edges with ultra-wide lenses in daylight, use f/11. These techniques ensure textures in ponchos, rails, and water are clear.
ISO and auto-ISO for dynamic light shifts
Turn on Auto ISO with a max like 3200 or 6400, which fits most modern cameras. Set the lowest shutter speed for your lens and situation. For avoiding overexposed spots in bright sunlight, use highlight or center-weighted metering and reduce exposure slightly.
Focus modes and burst shooting for reliability
For moving subjects, use continuous AF (AF-C/AI Servo) with a flexible area. Switch to single-point AF for still scenes like Horseshoe Falls to avoid unnecessary focusing. Use subject tracking for moving subjects and shoot in short bursts to capture clear shots through spray and movement.
| Scenario | Core Settings | Why It Works | Pro Nudge |
|---|---|---|---|
| Freeze droplets in bright sun | 1/1000s, f/5.6–f/8, Auto ISO capped at 3200 | Locks spray and passenger motion during swells | Use highlight‑weighted metering with −0.3 EV to protect whites |
| Gentle blur in the falls | 1/250–1/500s, f/8, Auto ISO capped at 6400 | Adds motion while resisting boat shake | Engage OSS/VR/IS and IBIS, but keep shutter priority |
| Edge‑to‑edge detail with ultra‑wide | f/11, 1/500s, Auto ISO | Maximizes corner sharpness and texture | Clean the front element often to prevent flare from mist |
| Backlit mist and rainbows | 1/1000s, f/8, −0.7 EV, Auto ISO | Holds color and stops highlights from clipping | Center‑weighted metering for predictable exposures |
| Tracking boats and people | AF‑C with flexible zone, short bursts | Maintains lock through spray and movement | Enable subject tracking; release in three‑to‑five‑frame bursts |
Mix these photo methods with careful positioning and lens cleaning. Controlling your speed, aperture, ISO, and focus ensures clear photos through mist. Keep these tips in mind to guide every shot on the water.
Smartphone Photography Techniques on a Boat Tour
To capture great photos on a boat, use these simple tips. Make sure your phone is dry, hold it steady, and plan your shots with the water mist in mind. These tricks are based on practical photography skills that work well in the moment.
Aim for control before the boat moves close to the falls. Start with basic settings, have a microfiber cloth handy, and secure your phone with a strap or lanyard. Also, keep it in a waterproof case when not shooting. This helps protect the screen and lens.
Using ultra-wide and tele modules effectively
To capture the full scene at Horseshoe Falls, use the ultra-wide lens. If it gets darker, switch to the main camera for clearer shots.
Steer clear of digital zoom. If your phone has a telephoto lens, use it for close-up shots. Otherwise, take wider shots and crop them later for the best clarity.
Locking exposure and focus to avoid hunting
Set your focus and exposure early, especially before water spray hits. On iPhone, lock it with AE/AF Lock; Android users can tap and hold or switch to Pro mode. This prevents the camera from losing focus when mist moves.
To keep the bright areas of your photos clear, slightly lower your exposure. Adjust it using the sun slider or compensation until the water looks right without being too bright.
Leveraging RAW and Night mode without blur
Whenever possible, use RAW formats to get the most out of your photos. They help with editing and keep colors looking natural.
In low light, stabilize your phone on a rail, use burst mode, and keep the shutter speed high. If using Night mode, keep exposure short to avoid blur from the boat’s movement.
Keep your lens cover clean, especially if it has a water-repellent coating. A simple wipe with a microfiber cloth reduces lens flare from water drops.
| Scenario | Best Camera Module | Key Setting | Why It Works | Extra Tip |
|---|---|---|---|---|
| Wide scenic at Horseshoe Falls | Ultra‑wide | Exposure −0.3 to −0.7 EV | Preserves highlight detail in bright water and mist | Lock AE/AF before the boat turns |
| Low light near the base | Primary wide | RAW enabled | Larger sensor reduces noise and keeps color depth | Brace on rail; use burst for sharp frames |
| Closer subject without grain | Optical tele (if available) | Auto ISO with AE/AF lock | Optical reach avoids digital artifacts | Shoot wider and crop if only digital zoom exists |
| Twilight spray and motion | Primary wide | Night mode 1–2 s | Shorter exposure cuts boat shake while keeping brightness | Lower EV to keep detail in foam and falls |
| Misty splash zones | Primary wide | EV −0.3; Pro mode if possible | Stable metering avoids focus hunting in drifting mist | Wipe lens often; store in waterproof pouch between shots |
Composition Tips That Elevate Your Travel Photography
Strong composition makes your Niagara Falls photos stand out. Put the horizon or gorge edge on a third line. This balances sky drama with the water’s churn below. Aim for simple, strong shapes that look good on both screens and in print.
Think in sequences for a full story. Start with a wide scene, add a mid view, then a close-up detail. This approach uses classic techniques for flexible later edits.
Rule of thirds, leading lines, and scale with boats
Place the gorge edge or mist along a third line to guide the viewer’s eye. Use rails, deck seams, or shorelines as leading lines towards the falls. Adding a boat’s bow shows the vast scale of the water’s wall.
To get clear shots, move slightly to the side and wait for the perfect boat angle. This tip changes a simple scene into something more dynamic.
Foreground interest: ponchos, rails, and droplets
Use bright ponchos in the lower third for color and a human touch. Add texture with shiny rails or droplets without distracting.
Avoid clutter like speakers and loose items in the foreground. Small moves are better than cropping out details later. This is a key tip in travel photography.
Framing Horseshoe, American, and Bridal Veil Falls
At Horseshoe Falls, go wide from the Canadian side to show the gorge’s depth. Include the arc across the frame, and shoot vertically for certain platforms.
For American and Bridal Veil Falls, focus on layers with a mid-zoom. Mix tight shots with wide frames for a compelling narrative. This combines techniques for impactful photos.
Creative Photography Techniques in the Mist
Imagine standing surrounded by spray, light, and the sound of thunder. This is where bold photography skills come alive. Follow these tips to make your travel photos pop, especially with help from Niagara Falls Boat Cruise Photo Tips for Travelers.
High key vs. low key interpretations
To achieve a high key look, increase exposure to brighten your shots and keep whites pure. Remember to shoot in RAW. This captures every detail in the mist’s glow. Letting the background blur makes the falls seem airy.
For a low key effect, reduce exposure to emphasize shadows and dark edges. Use contrasts, such as whitewater against shadows, to create drama. These methods give your photos depth and apply to many scenes.
Intentional motion blur and panning
Slow down your shutter speed between 1/10–1/30 seconds and move your camera with the motion. Stay steady for clear shots of moving subjects against a blurred background. Avoid using heavy filters in strong spray; evening light works just fine.
Try each angle three times and check the focus closely. These practices from Niagara Falls tips are great for capturing any moving scene well.
Backlighting rainbows and silhouettes
With the sun behind you, spray might turn into a rainbow. Block unwanted light with your hand or a lens hood. Aim to include a rainbow over a strong structure, like a railing, for a stunning photo.
To capture silhouettes, adjust your setting to highlight the background, letting figures appear dark. Wet surfaces and droplets can add interesting effects to your shots. These tips not only enhance your travel photos but also align with the Niagara Falls Boat Cruise Photo Tips for Travelers.
| Creative Goal | Exposure Bias | Shutter/Aperture | Focusing Approach | Field Tip |
|---|---|---|---|---|
| High Key Mist Glow | +0 to +0.7 EV | 1/250s–1/500s at f/5.6–f/8 | AF-C with center point; shoot RAW | Watch histogram; protect highlights in spray |
| Low Key Drama | −0.7 to −1.3 EV | 1/250s at f/8–f/11 | Single-point AF on contrasty edges | Use dark rock or hull to frame bright foam |
| Motion Blur Pan | 0 EV | 1/10–1/30s at f/8 | AF-C; track a subject along your sweep | Pan with the boat; take three-shot bursts |
| Rainbow Backlight | 0 to −0.3 EV | 1/500s at f/5.6 | AF-S; lock focus, recompose | Shade lens with hand; align arc with railing |
| Silhouette Portrait | −1.0 EV | 1/1000s at f/4–f/5.6 | Meter for highlights; focus on edge of subject | Place subject against brightest mist for crisp edges |
Safety, Etiquette, and Environmental Stewardship
Your boat tour photo session begins with making smart choices. It’s all about blending practical travel tips with solid photography advice. This way, you’ll capture amazing shots while keeping the deck calm and everyone safe. Pack lightly, plan ahead, and consider your photography essentials as part of your safety gear.
Protecting gear and respecting fellow travelers
- Always keep your gear secure by using straps and avoiding leaning over railings.
- Be considerate and step aside after taking your photos. Remember to keep tripods away on busy decks if they’re not permitted.
- Get permission before taking photos of people and respect children’s privacy.
- Be efficient with your travel tips and photography advice by pre-setting your camera and keeping essentials within quick reach.
Staying secure on wet decks
- Wear non-slip footwear, maintain a stable stance, and slightly bend your knees for balance on the moving boat tour.
- Avoid leaving gear on the deck where it might slide. Secure loose items so they don’t end up overboard.
- Always listen to the crew’s safety instructions immediately. Safety announcements are more important than any photo.
- Follow this simple photography advice: use straps and have your gear in pouches for quick access and security.
Leave-no-trace travel tips near the falls
- Always take used wipes and cloths with you. Never throw ponchos or tissues overboard but use bins at the terminal instead.
- Keep lens-cleaning solutions tightly sealed to avoid spillages on the deck and in your bag.
- Do not feed any wildlife or disturb nesting birds in the area.
- Opt for lasting photography essentials and plan your boat tour using eco-friendly travel tips that decrease waste.
Plan Your Cruise with Niagara Falls Canada Tours
When you book with Niagara Falls Canada Tours, you get the best light and easy access to top spots. They plan your boat tour to match the day’s conditions, supporting your photo needs. With their photo tips, you’ll be ready with helpful advice and a solid plan.
Choose your experience: Day, Evening, or Freedom Day Tour
The Day Tour from Toronto includes bright scenes and classic rainbow views. It’s great for clear photos and is family-friendly.
The Evening Tours offer softer light and stunning skies. They’re perfect for unique shots and creative photography.
If you like exploring alone, the Freedom Day Tour is for you. It lets you take photos at your own pace from the best spots on the Canadian side.
Fleet options for groups and private charters
We have vehicles for any size group. Choose from the Dodge Grand Caravan or the Mercedes Sprinter Van for small groups. Or go bigger with our Luxury Mini Coach Bus or the Krystal Coach.
For larger parties, there’s a 56 Passenger Coach Bus. And our Airport Taxi & Limo Service makes getting there easy. Private options mean you can get ready, change lenses, and stick to your schedule smoothly.
How to book 24/7 and what to expect on arrival
You can book any time online or by email. You’ll quickly get a confirmation with all the details you need for your cruise.
When you arrive, check in at the pickup point and meet your guide. Make sure to have your camera ready, wear comfy shoes, and dress for the weather. Keep those photo tips in mind, follow easy travel advice, and you’ll have a great photography experience on your cruise.
Conclusion
Turning a misty cruise into great photos needs planning and calmness. Time it for soft light and look for rainbows in the spray. Also, watch the clouds over the gorge. Make sure your gear is weather-proof, or use a trustworthy phone. Don’t forget a dry bag and a cloth. Choose fast shutter speeds and control the highlights well. These tips help make your Niagara Falls photos stand out.
Keep your camera setup simple. Use wide lenses to capture the vastness, then switch for close-ups and details. Lock the focus, use burst mode, and hold steady. Make your pictures tell a story with interesting things in the foreground. These tips will change your snapshots into lively images.
Remember to be safe and kind on slippery decks. Help keep the river clean and respect others’ space. Ready to plan? Niagara Falls Canada Tours has day and night cruises, plus options for everyone. They offer endless help and easy booking. Use these tips as your guide, and capture the beauty of Niagara Falls in your photos.
FAQ
What’s the best time of day to photograph Niagara Falls from the boat?
Golden hour offers warm light and softer contrast, perfect for pictures. Blue hour brings mood and smooth tones, ideal for travel shots. Mid-morning to early afternoon is great for capturing rainbows, with the sun behind you. Overcast days provide soft lighting, protecting the highlights in your photos.
How do you keep your camera dry in heavy mist on a boat tour?
Wear the given poncho and hide your camera under a dry bag or jacket when not shooting. Use a clear or UV filter to protect the lens. Carry microfiber cloths to keep the lens clean. Also, a hydrophobic filter and silica gel packs help. If the lens fogs, warm it under your poncho until it clears.
Which camera settings work best for spray and motion on the water?
Start with a fast shutter speed, like 1/1000s, to capture droplets clearly. Use f/5.6–f/8 for detailed images. Set up Auto ISO with a limit, and underexpose slightly to protect bright spots. Choose continuous autofocus to capture movement smoothly. It’s best to shoot in short bursts to catch the perfect moment.
What lenses should you bring for Niagara Falls photography on a cruise?
Carry an ultra-wide lens for panoramic views of the falls. A 24–70mm or 24–105mm lens is great for detailed shots. A fast prime lens works wonders in low light. Try to avoid changing lenses on the deck, but if needed, be quick and shield your camera from spray.
Are weather-sealed cameras necessary, or can you use a compact?
Weather-sealed equipment is best in the mist. Rugged compacts are also effective. Protect your gear with a dry bag and filters. Regularly check your lens for water to keep your shots clear.
How can you stabilize shots on a moving deck?
Lean on the railing, bend your knees, and shoot when the movement is least. Use burst mode and stabilization features, but prioritize fast shutter speeds. Secure your equipment with a strap and a tether for safety as you move around.
What are quick tactics for sharp, vibrant images in difficult light?
Set your camera on shutter priority or manual with Auto ISO for fast shots. Choose the right white balance for natural colors and shoot in RAW. A lens hood can prevent flare, helping keep your photos vibrant. Always expose for the brightest parts to maintain detail.
How do you capture rainbows and silhouettes in the mist?
For rainbows, position yourself with the sun behind you. Use your hand or a hood to shade the lens. For silhouettes, meter towards the bright mist. Experiment with exposure to get the right effect, whether it’s a radiant spray or a dramatic silhouette.
Any composition tips to convey scale and story?
Place the horizon or gorge rim using the rule of thirds. Lead viewers into the scene with lines from the deck. Include colorful elements like boats or ponchos to show the scale of the falls. Mix wide scenes with close-up details for variety, and don’t forget to shoot verticals for social media.
What smartphone photography tips work best on a boat tour?
Use your phone’s ultra-wide lens for expansive views and the main lens for quality. Skip the heavy zoom, opt for optical or crop later. Lock focus and exposure to avoid blur, and slightly reduce brightness. Shoot in RAW for editing flexibility. For night shots, keep exposures short to avoid blur.
How should you prepare for seasonal changes on Canadian-side tours?
Spring features strong flows, so bring extra lens wipes. Summer offers long, colorful days. In autumn, the leaves add a beautiful contrast. Winter is cooler and has unique icy views, but dress warmly and pack extra batteries.
What safety and etiquette guidelines should you follow on wet decks?
Keep your camera strapped and maintain a firm hold. Wear shoes that won’t slip, and move carefully. Be mindful of others’ views, stepping aside after you’ve got your shots. Always ask before taking someone’s picture, and be respectful of privacy. Dispose of any trash properly to keep the area clean.
Can you book day and evening cruises with Niagara Falls Canada Tours?
Yes, you can opt for a day tour from Toronto for bright light and rainbows. The evening tour offers beautiful lighting. Want to go at your own pace? The Freedom Day Tour doesn’t include a cruise, so you can explore more on land.
How do you book 24/7 and what happens on arrival?
Book anytime at https://niagarafallscanadatours.com/ or email info@niagarafallscanadatours.com. On arrival, check in at the pickup spot, meet your guide, and go to the terminal within your time slot. Wear layers that repel water, sturdy shoes, and pack your photography gear.
Do group and private photography charters exist?
Niagara Falls Canada Tours offers a fleet for group or private tours. Choose from vans, mini coaches, or full coaches. They also have limo service. For a personal touch, ask about private charters tailored to your photography needs.
What extra gear should you pack beyond the camera?
Don’t forget a dry bag, cloths for cleaning, a small towel, and anti-fog wipes. Bring extra batteries and a strap for your camera. A clear filter and a slim case will help protect your phone, too. These items will keep you ready for any weather.